If automatic installation fails, or you want to install a theme that
is not available in the WordPress directory, you’ll need to use this
alternative route for installing your theme.
You will need to know several details about your server / hosting account:
You will need to know several details about your server / hosting account:
- server address / domain name
- hosting/server username
- hosting/server password
- location of your WordPress installation inside the hosting account (usually directly into the public_html folder or some folder inside this)
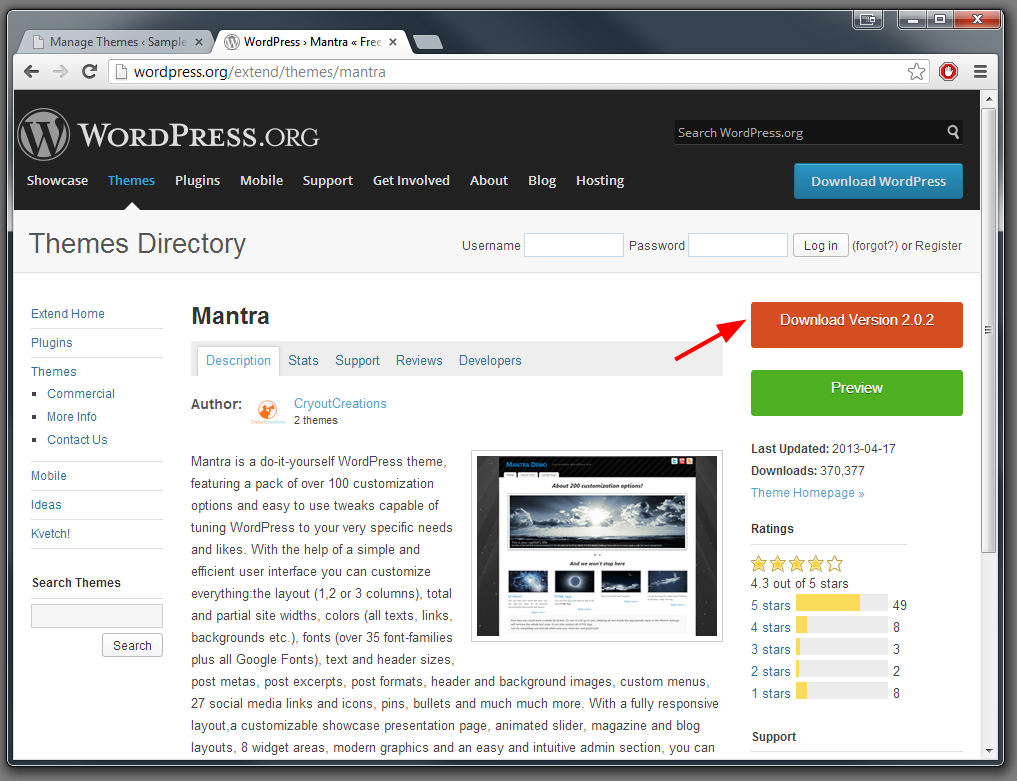 |
1. We are using Mantra in this example, so we have to download it. You need to do the same with your desired theme. |
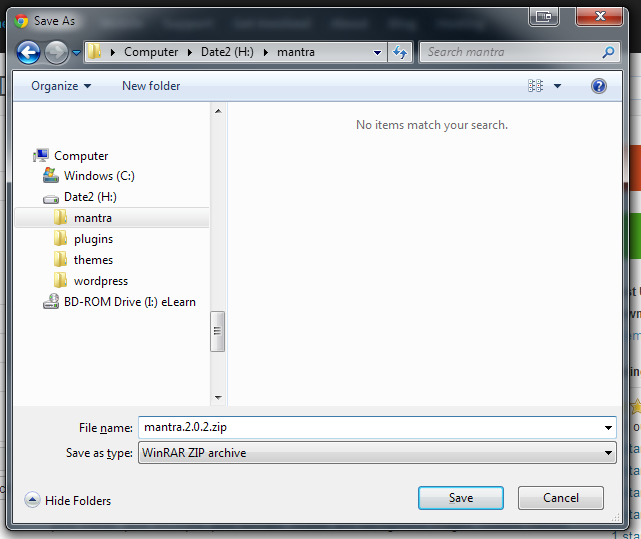 |
2. Save the theme archive on your computer (in case you don’t already have it) |
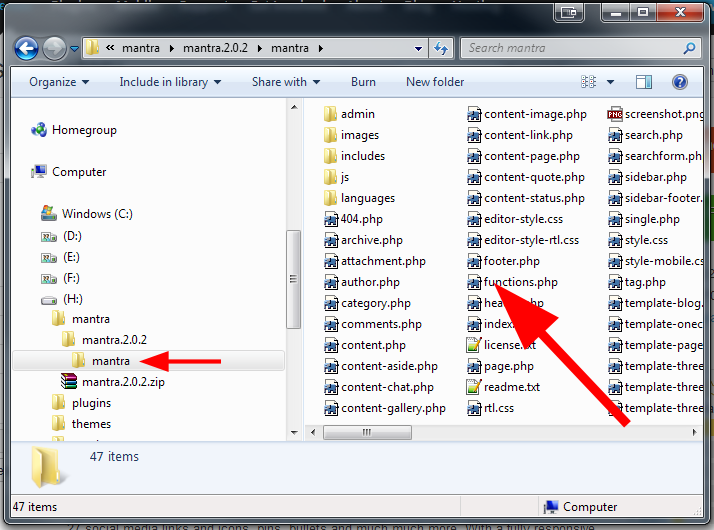 |
3. Extract the theme archive. You should get a folder named the same as your theme with a lot of files and folders inside it (specifically, check that it contains style.css and functions.php) |
 |
4. Using FileZilla, connect to your hosting account. In the left pane navigate to the folder obtained in step 3.In the right pane navigate to your WordPress installation folder (look for wp-admin and wp-content). Once you have locate this, navigate inside wp-content/themes. Right click the “theme_name” folder on the left pane and select Upload from the menu. |
 |
5. After the transfer is complete you should see the new theme folder right next to the default (as of WordPress 3.5) twentyeleven and twentytwelve themes folders. |
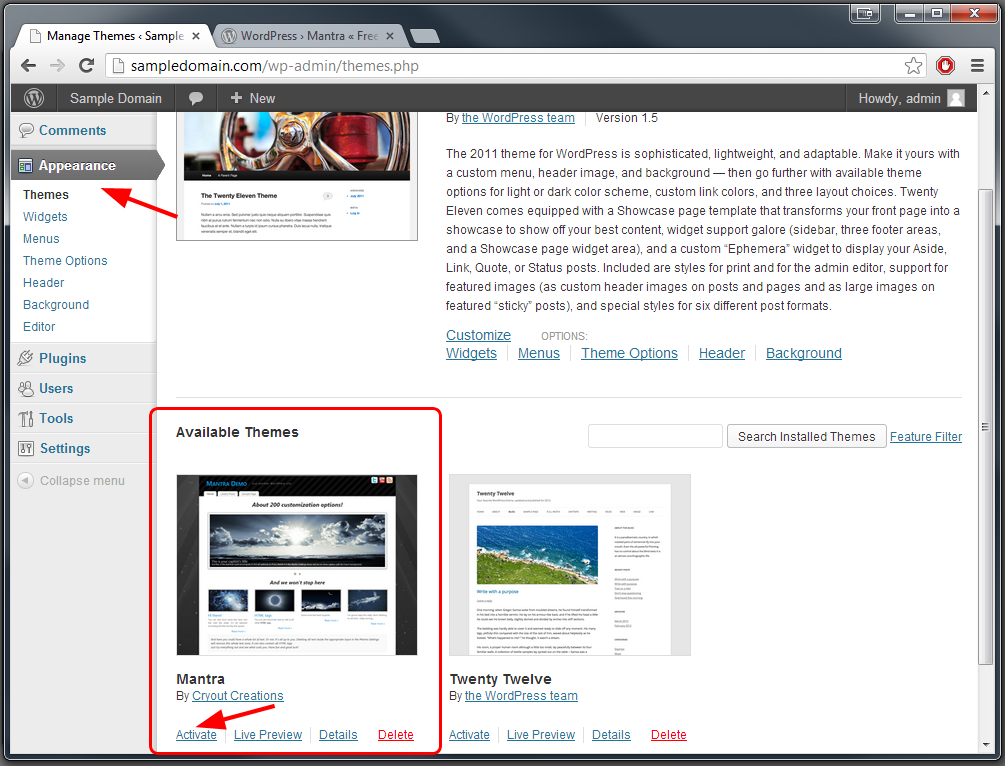 |
6. Via the dashboard, navigate to Appearance > Themes. The new theme should be displayed in the list. Click the Activate link to enable it. |
0 comments :
Post a Comment
সফিক গ্রাফিক্স
মেলান্দহ বাজার, জামালপুর।